I'm getting married soon, and need a wedding band. I don't particularly like yellow gold, or any of the funky new materials like cobalt or titanium or carbon fiber or whatever. Silver or white gold look the best to me: plain, simple and classic. I particularly like how silver ages over time.
Which got me thinking: silver is easily worked with at home. You can even cast it without much effort. Could I DIY my wedding band? After purchasing the requisite equipment, I doubt it'll save any money. But it'll be fun, unique and make for a good story. And allow me to procrastinate on more important planning details like how we're going to feed everyone :)
Silver casting: Janky Edition
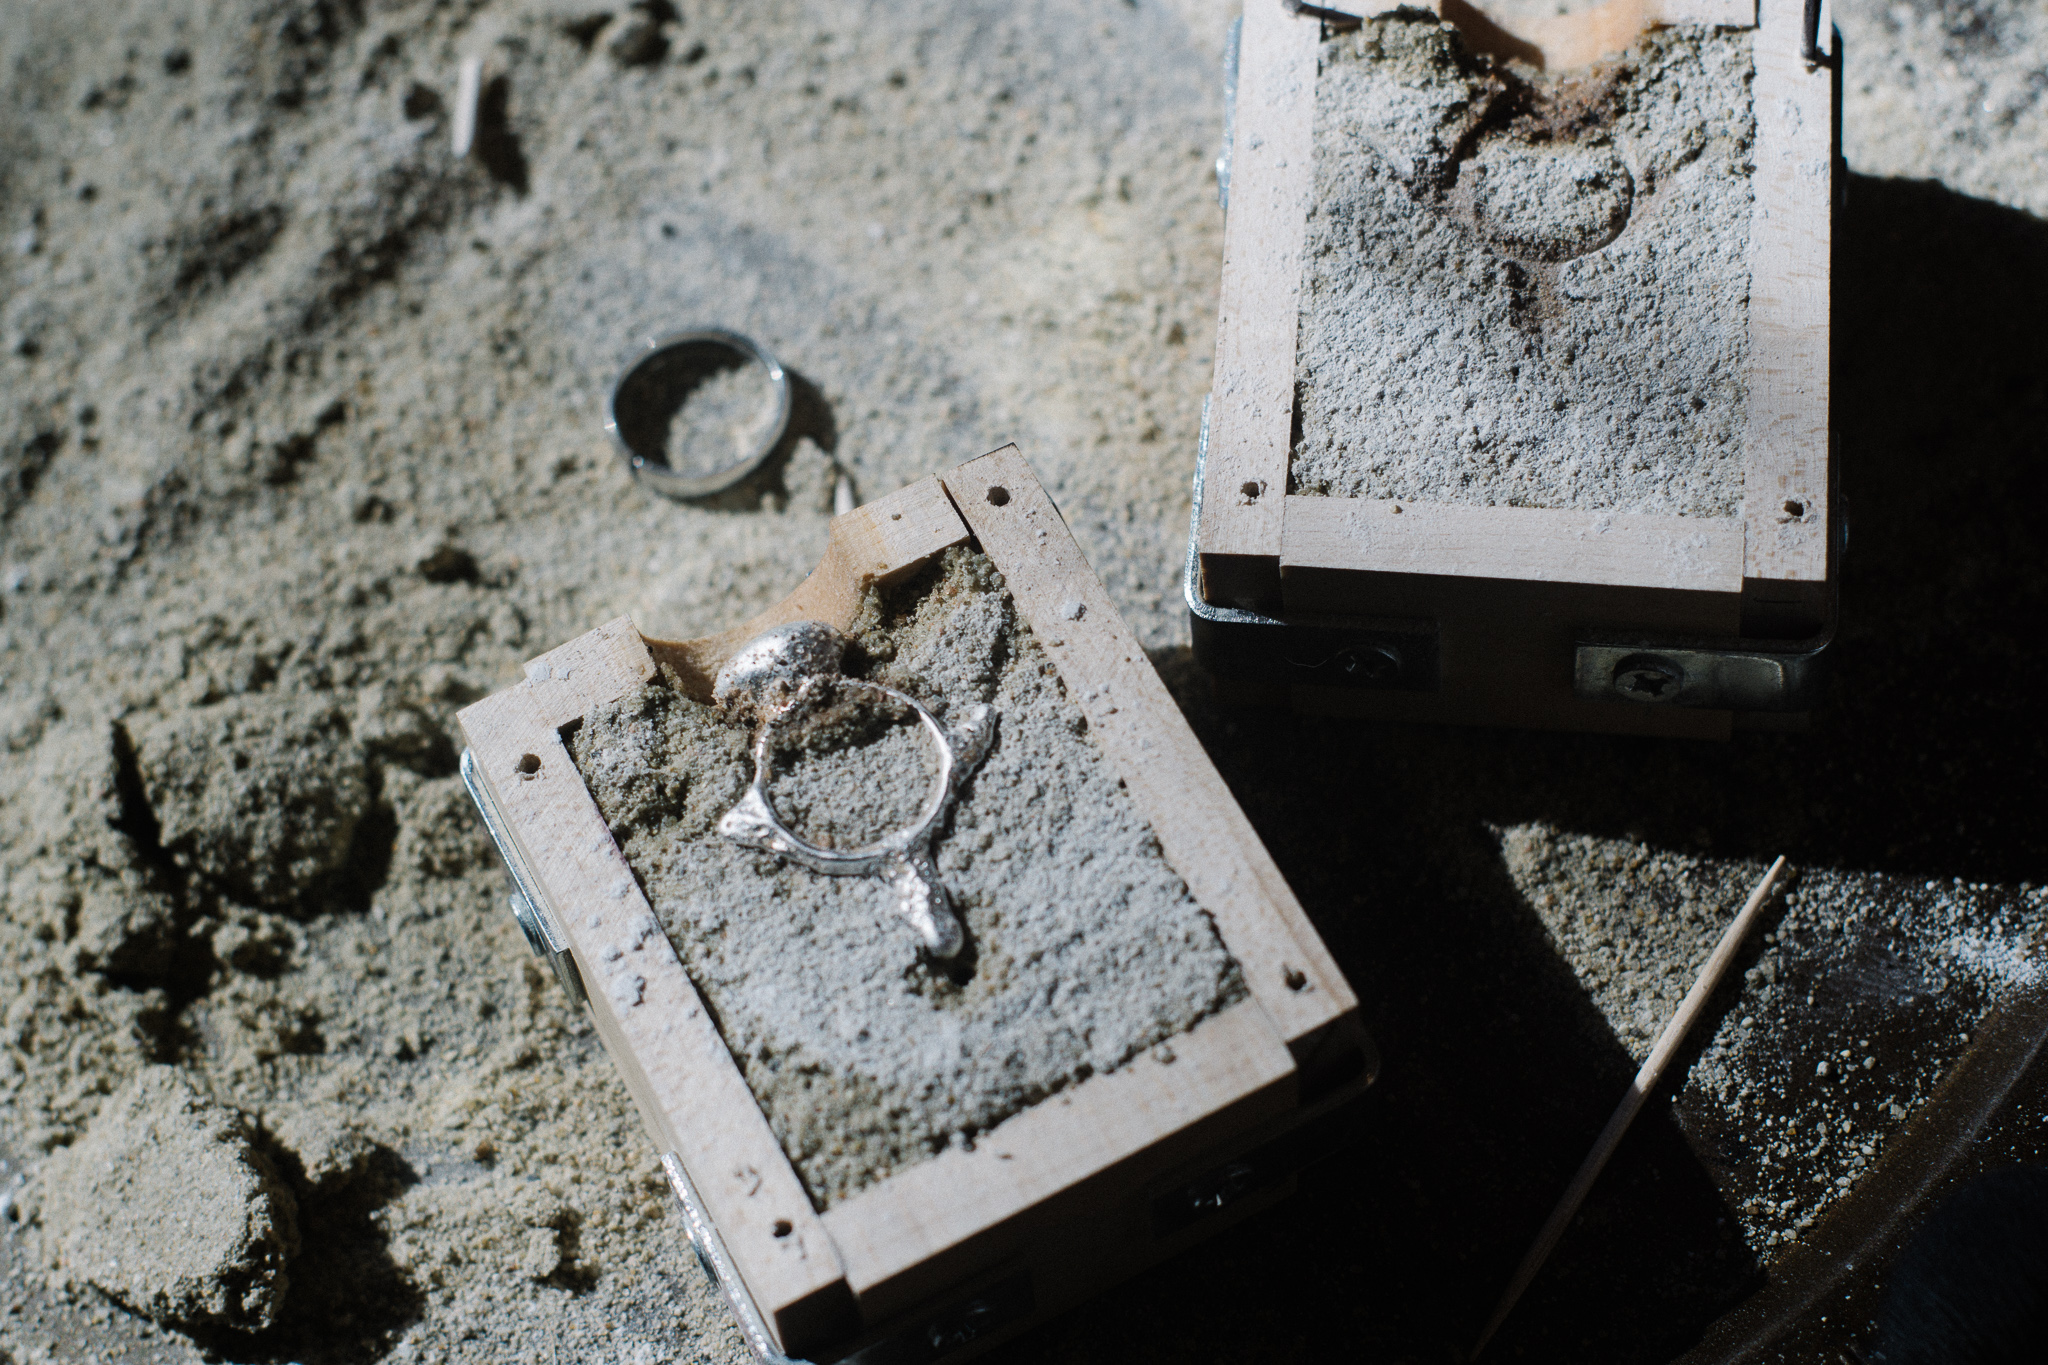
The easiest way to cast silver is with a two-part mold made from sand or clay. You pack one side with sand, embed the object you want to copy, attach the other side of the frame (also known as the “flask”) and continue packing sand. Then you separate the two halves, remove the object and cut a funnel to pour in the molten silver.
My first approach was 100% DIY. I was hoping to make everything work with minimal financial outlay. So I built a (really janky) wooden frame held together with steel L-brackets, and mixed up a batch of casting sand.
Casting sand needs to be as fine as possible. I took standard play sand and sieved it to collect the finest particles, then mixed in some pumice and bentonite clay. The bentonite clay acts as a binder when water is added, and helps keep the sand clumped together. The pumice was an attempt to get a finer consistency to better replicate small details.
Once thoroughly mixed, you need to slowly add water. This is best done with a spray bottle or mister. If you just pour water in, you'll get clumps that never un-clump. The process is long and tedious: spritz surface of sand, mix thoroughly, repeat.
The sand is ready when you can squeeze a clump in your fist and it retains its shape, and then breaks cleanly in half without crumbling, but disintegrates back to sand when you apply too much pressure. It needs to be just right: too little water and your mold collapses, too much water and you may flash steam through the mold and ruin the casting.
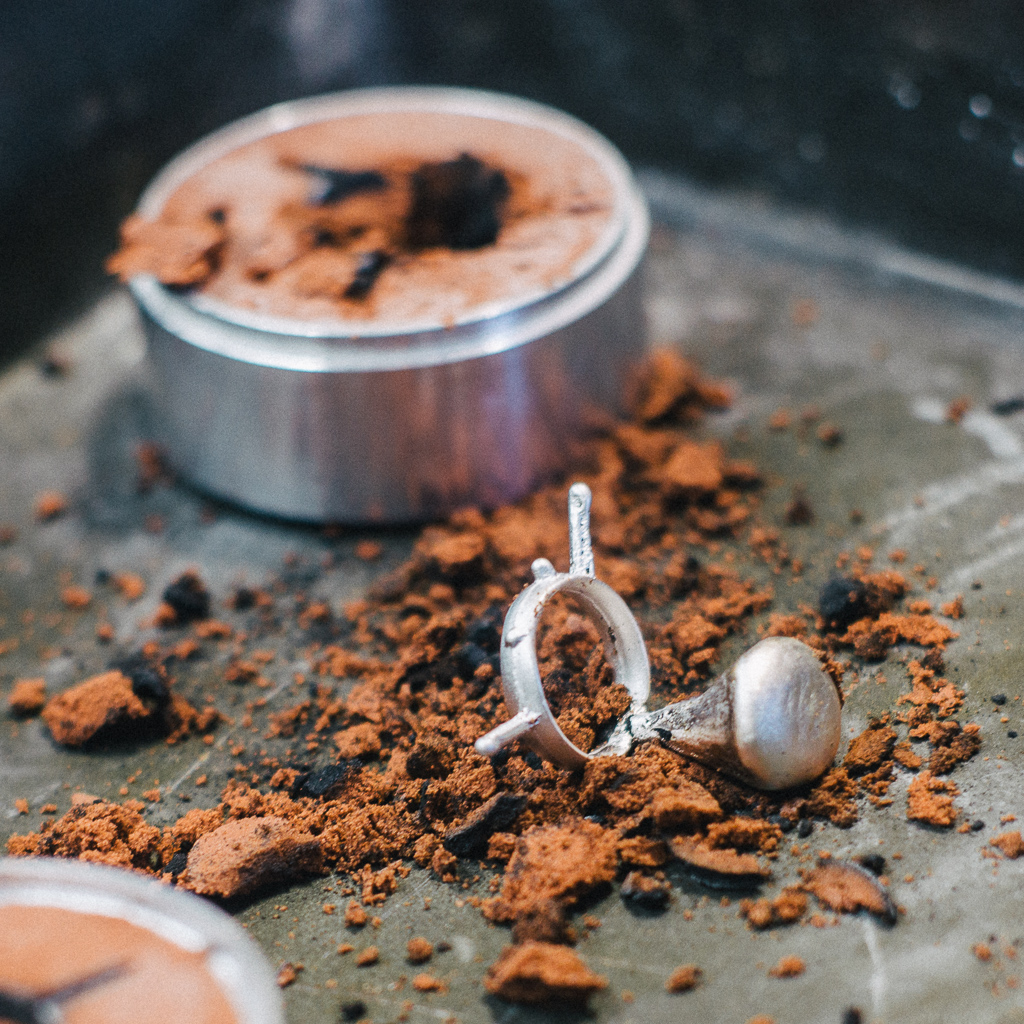
Once assembled, you melt some silver in a ceramic crucible. I'm using Argentium 935, which is a silver alloy that contains copper (like traditional sterling) and some germanium. The added germanium gives the alloy tarnish resistance, no firescale, and increased strength. All desirable properties for a wedding band.
To melt the silver, I'm using a cheap oxy/mapp gas torch found at Lowes or any similar big box hardware store. I've been using a neutral-to-slightly-reducing flame, which is sufficient to melt the silver and saves some oxy. You don't have to worry too much about oxidation because Argentium is resistant to firescale.

So did it work? I suppose it depends on your definition of “success”. But I'd say no, it didn't work :)
-
The casting sand did not maintain it's structure rigidly enough, no matter how I played with the mixture. This meant it would crumble at the interface between two halves. After casting, this led to seepage along the mold lines.
-
Sand would crumble into the mold as silver was poured through the funnel, leading to large voids
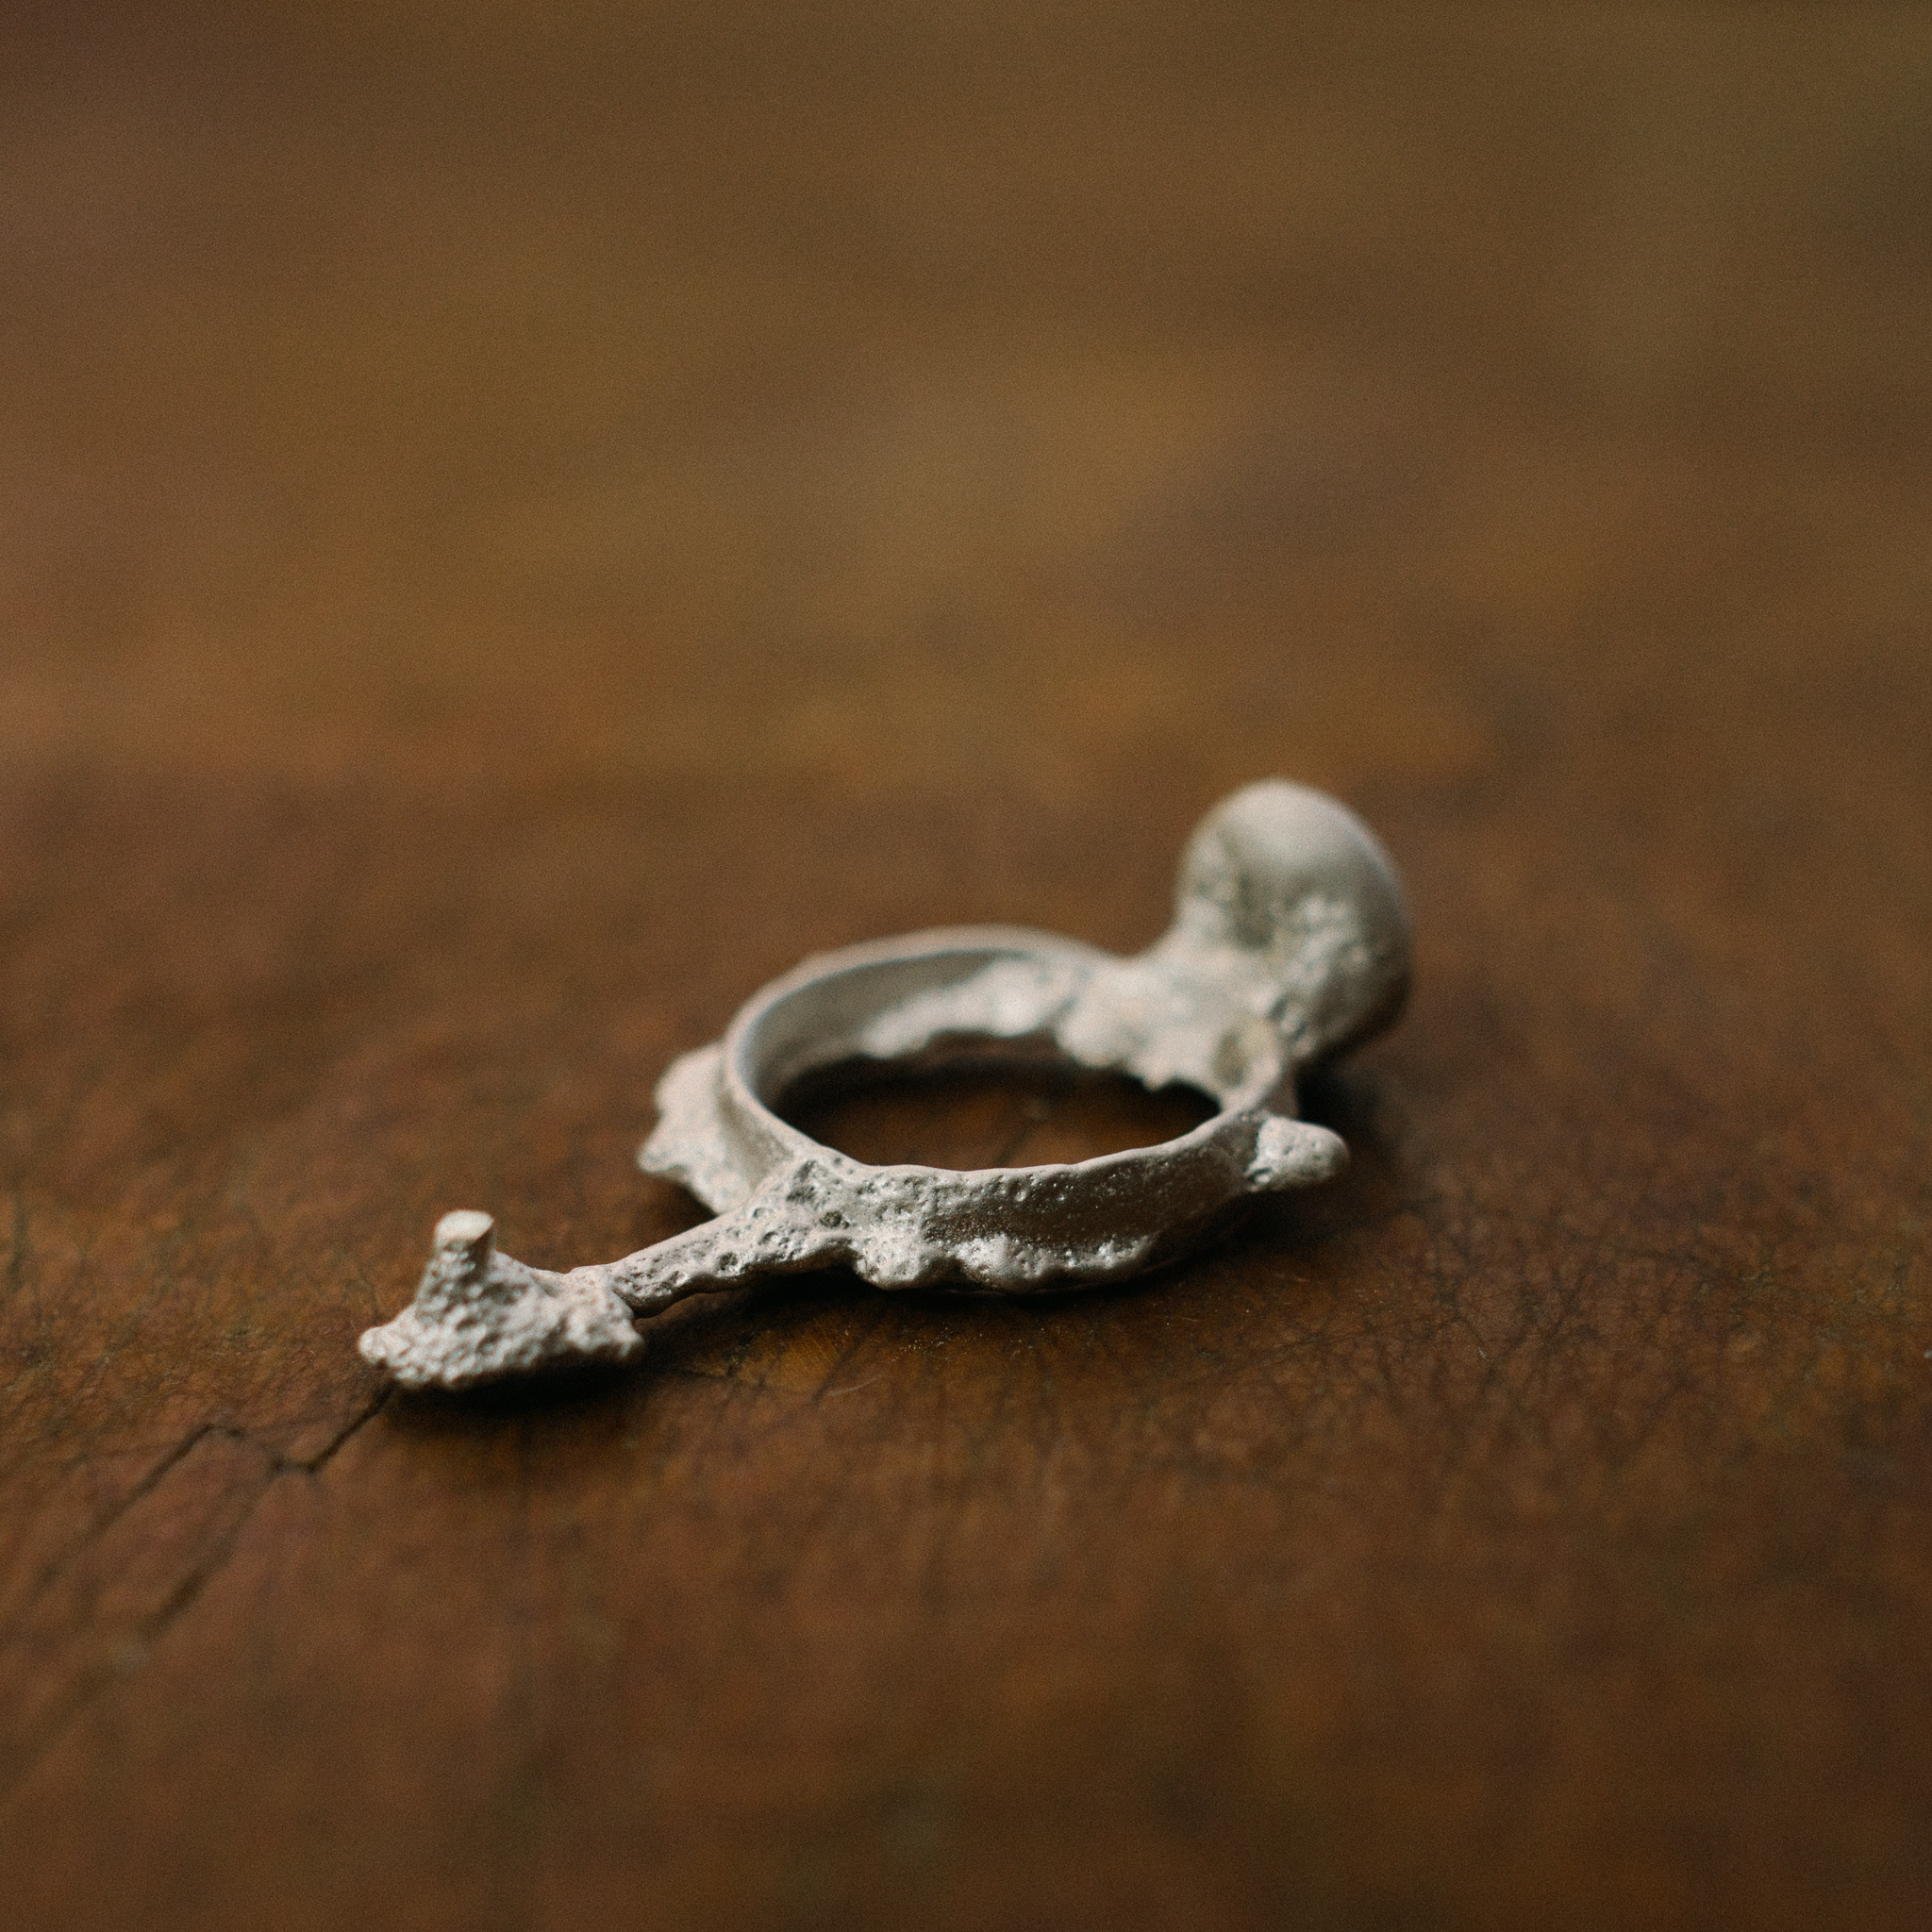
-
The sand itself is not fine enough, which led to a very rough texture. This could be fixed afterwards with filing/polishing, but it's more work
Silver casting: proper equipment edition
I'm sure I could have gotten it to work eventually. But I have a deadline, and was getting frustrated (and received a note from amazon saying the FDA recently recalled the bentonite I purchased because it contained lead. Yay.)
So I decided to spend some money and get a proper casting kit. This kit came with a steel flask which is circular in shape, and 5lbs of Delft Clay. Delft clay is a very fine clay/oil mixture which is great for casting. Think of it as casting sand on steroids.
The advantage of delft is that it maintains it's shape very well, replicates very fine details and is easy to work with. The downsides are price (it's expensive!) and the fact that it isn't permeable to air like coarser sand, so you need to sprue in more air holes. A little bit also burns each time you cast, so you'll slowly deplete your stockpile of clay.
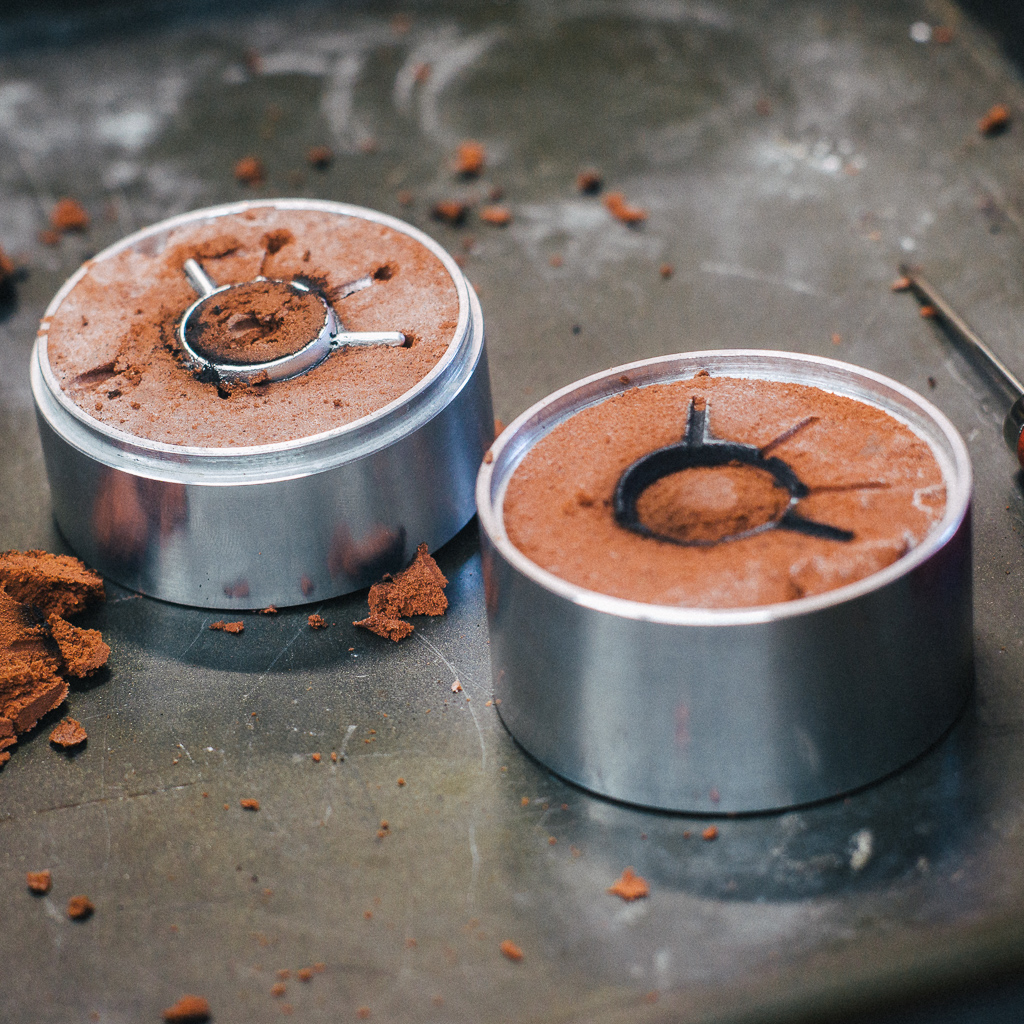
It took several more attempts to work out the proper sprue and funnel size, but I eventually managed to pour a decent ring. There are still a few voids that snuck in, and the back of the ring didn't quite fill in correctly (meaning I still have some flow problems, or the metal wasn't quite hot enough). But overall I'm fairly happy.
I'll file and polish this ring up for practice. But I'll likely melt it down and try again. I still have a month to perfect the ring, might as well try again :)
I'm also considering some alternative alloys, such as Electrum (silver and gold in roughly equal percentages) or Shibuichi (5-25% silver, the rest copper). Electrum forms a pretty greenish-gold alloy and is very durable. Shibuichi forms a pinkish-white alloy and, depending on the amount of copper, patinates to a wide variety of colors.